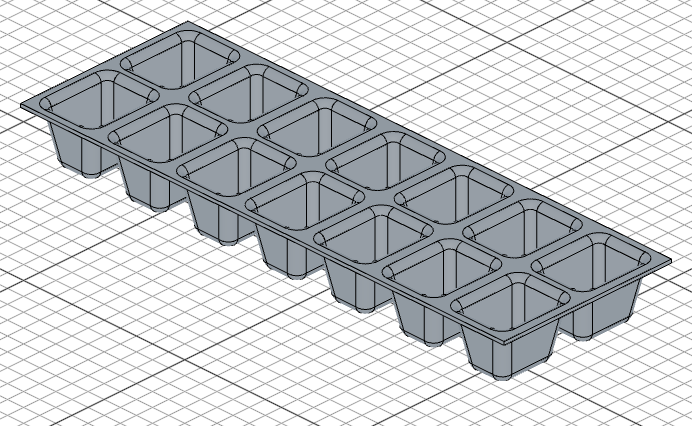
Building an Ice Cube Tray
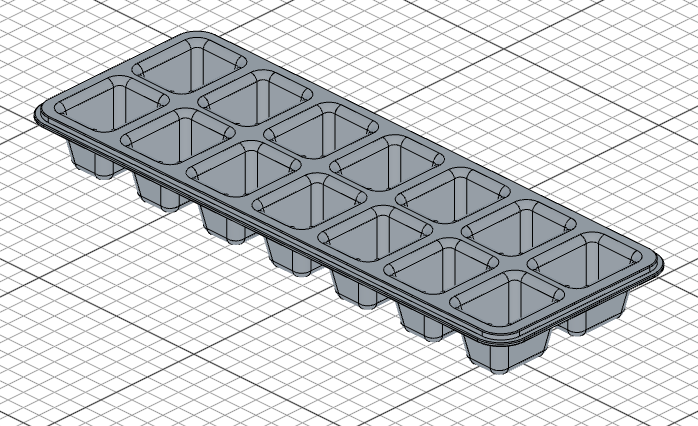
In this tutorial, you'll build a parametric ice cube tray from scratch, based on the original design by Product Design Online. It covers draft cuts, filleting internal faces, linear patterns, shelling, edge selection with filters, and sweeping a profile along a spine.
Create a new file called ice-cube-tray.fluid.js in your project.
Setup
Start with imports and some variables that define the tray's dimensions. Using variables makes the model parametric — change a number and the whole tray updates.
import { axis, circle, color, cut, extrude, fillet, fuse, hMove, loft, move,
    offset, plane, polygon, project, rect, repeat, revolve, select, shell,
    sketch, sphere, sweep, translate } from 'fluidcad/core';
import { edge, face } from 'fluidcad/filters';

const width = 300;
const length = 104;
const height = 50;
const leftOffset = 7;
const topOffset = 7;
const depth = 30;
const draft = 10;
const thickness = 2;
width/length— overall tray dimensionsheight— how tall the tray walls areleftOffset/topOffset— how far the first cavity is inset from the tray edgedepth— how deep each ice cube cavity isdraft— draft angle so the cavity walls taper inward (makes ice easier to release)thickness— wall thickness after shelling
Step 1: The tray body
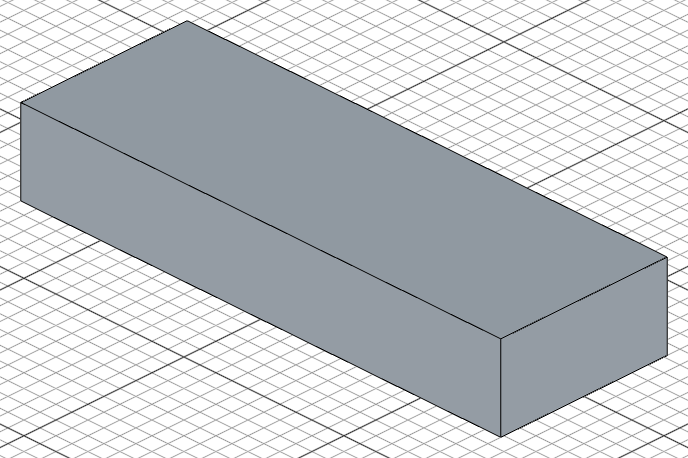
The tray starts as a simple rectangular block.
sketch("xy", () => {
    rect(width, length).centered();
})

let e = extrude(height)
rect(width, length).centered() draws a 300 x 104 rectangle centered on the origin. extrude(height) pushes it up 50 units to create a solid block. We store the result in e so we can reference its faces later.
Step 2: Cut the first cavity
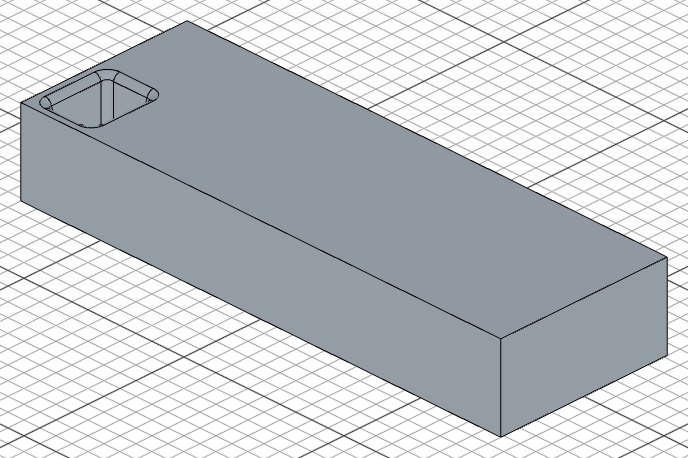
Now we cut a single cavity into the top of the tray, with a draft angle and rounded edges.
Sketch on the top face
sketch(e.endFaces(), () => {
    move([-width/2 + leftOffset, -length/2 + topOffset])
    rect(30, 40)
});
e.endFaces() gives us the top face of the extruded block — we sketch directly on it. move() positions the rectangle's starting corner inset from the tray edge by leftOffset and topOffset. The rectangle is 30 x 40 units.
Cut with draft
let c = cut(depth).draft(-draft)
cut(depth) removes 30 units of material downward from the sketched rectangle. .draft(-draft) adds a 10-degree taper so the cavity walls angle inward — this is what makes ice cubes pop out easily.
Fillet the cavity
fillet(4, c.internalFaces())
c.internalFaces() selects all the faces inside the cut cavity. fillet(4) rounds every internal edge with a 4-unit radius, giving the cavity smooth corners.
Step 3: Pattern the cavities
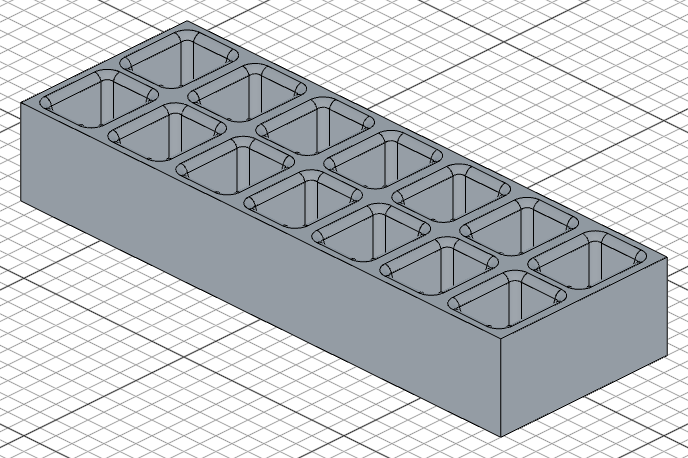
One cavity is enough to define the shape — now we repeat it across the tray in a grid.
repeat("linear", ["x", "y"], {
    count: [7, 2],
    length: [255, 50]
});
repeat("linear") duplicates the previous operation in a grid pattern. The axes ["x", "y"] define the two directions. count: [7, 2] creates 7 columns and 2 rows, and length: [255, 50] sets the total span of the pattern in each direction. This produces 14 evenly spaced cavities.
Step 4: Shell the tray
Right now the tray is a solid block with holes cut into it. We need to hollow it out.
shell(-thickness, e.startFaces(), e.sideFaces());
shell(-thickness) hollows the solid with 2-unit thick walls. The second and third arguments — e.startFaces() (the bottom face) and e.sideFaces() (all four side faces) — are the faces to remove. This leaves the top rim and the cavity walls intact while creating a thin-walled tray.
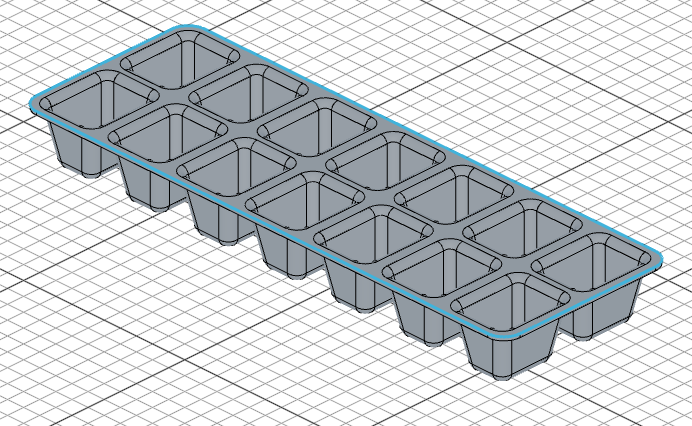
Step 5: Add the handle
The final step adds a grip detail along the top edge of the tray using edge selection, filleting, and a sweep.
Fillet the top edge
select(edge().verticalTo("top").onPlane("yz", { offset: width/2, bothDirections: true }))

fillet(10)
edge() starts a filter chain. .verticalTo("top") finds edges that are vertical relative to the top. .onPlane("yz", { offset: width/2, bothDirections: true }) narrows to edges on the YZ plane at half the tray's width (the right-hand end). fillet(10) rounds this edge with a 10-unit radius, creating a smooth contour.
Define the sweep spine
const spine = select(
    edge().onPlane("top", height).arc(10).withTangents(),
)
This selects the sweep spine along the top rim of the tray. .onPlane("top", height) filters to edges at the top, .arc(10) picks the arc we just created with the fillet, and .withTangents() expands the selection to include every edge tangent-connected to it. Because a fillet produces G1 continuity with its neighbors, this automatically grabs the front and left top edges, giving us a continuous path from a single filter.
Sketch the profile and sweep
const p = plane(e.sideFaces(0), -10)
const profile = sketch(p, () => {
    move([-length/2, height])
    rect(-2, -3)
    hMove(2)
    rect(-5, -2)
});

const s = sweep(spine, profile)

fillet(0.5, s.sideEdges())
plane(e.sideFaces(0), -10) creates a plane offset 10 units inward from the first side face — this is where the profile cross-section will be drawn. The profile is an L-shaped step made of two rectangles: a 2 x 3 lip and a 5 x 2 ledge.
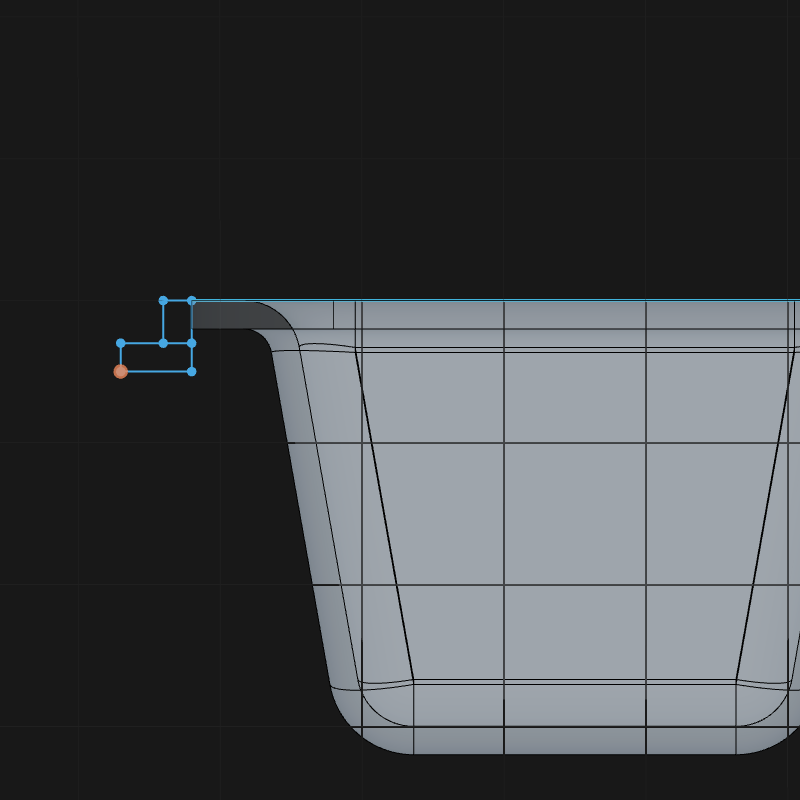
sweep(spine, profile) extrudes this profile along the spine path, creating a grip that runs along the tray's top edge. Finally, fillet(0.5, s.sideEdges()) softens the sharp edges of the sweep.
Full code
import { axis, circle, color, cut, extrude, fillet, fuse, hMove, loft, move, offset, plane, polygon, project, rect, repeat, revolve, select, shell, sketch, sphere, sweep, translate } from 'fluidcad/core';
import { edge, face } from 'fluidcad/filters';

const width = 300;
const length = 104;
const height = 50;
const leftOffset = 7;
const topOffset = 7;
const depth = 30;
const draft = 10;
const thickness = 2;

sketch("xy", () => {
    rect(width, length).centered();
})

let e = extrude(height)

sketch(e.endFaces(), () => {
    move([-width/2 + leftOffset, -length/2 + topOffset])
    rect(30, 40)
});

let c = cut(depth).draft(-draft)

fillet(4, c.internalFaces())

repeat("linear", ["x", "y"], {
    count: [7, 2],
    length: [255, 50]
});

shell(-thickness, e.startFaces(), e.sideFaces());

select(edge().verticalTo("top").onPlane("yz", { offset: width / 2, bothDirections: true }))

fillet(10)

const spine = select(
    edge().onPlane("top", height).arc(10).withTangents(),
)

const p = plane(e.sideFaces(0), -10)
const profile = sketch(p, () => {
    move([-length/2, height])
    rect(-2, -3)
    hMove(2)
    rect(-5, -2)
});

const s = sweep(spine, profile)

fillet(0.5, s.sideEdges())
What you practiced
- Parametric variables — defining dimensions at the top so the whole model adapts when you change a value
rect().centered()— centering a rectangle on the sketch origin.endFaces()/.startFaces()/.sideFaces()— referencing specific faces of an extrusioncut().draft()— removing material with tapered wallsfillet()withinternalFaces()— rounding all edges inside a cutrepeat("linear")— duplicating geometry in a 2D grid patternshell()— hollowing a solid while removing specific facesedge()filters — selecting edges by orientation and plane position.withTangents()— expanding a selection to include all tangent-connected shapessweep()— extruding a profile along a curved spine path